Wednesday, December 26, 2012

Christmas Moon Photo

I hope everyone had a wonderful Christmas!  I got one of the things I really wanted: Photoshop Elements 11!  I have been using Lightroom 3 for my portraits and everyday shots, Picasa for quick editing when all I need is a watermark or a slight tweak, and GIMP for actual cut and paste editing.  I had tried PSE before in earlier versions and found it confusing and hard to use.  GIMP is very technical and I had some stuff figured out but even the help files can be rough.  Picasa is fun and cool but limited and instagrammy.  Nothing wrong with that but it only takes you so far.

I was impressed with PSE11 immediately.  The user interface (UI) is simple and based on common sense.  The terminology is easy to follow and there are links to help files all over the place.  The help files themselves are also simple to understand and actually answer your questions instead of causing more!

For instance, it took me about an hour to create this photo in GIMP:


I cut the moon out of another photo using the "Paths" tool.  This is painstaking.  I had to click every centimeter or so around the outline of the moon in order to try to get it to come out without any black edges and then figure out how to select the path that I had made (took 2 tutorials to get to the root of it, and they were outdated so it actually wasn't useful info) and then I skewed it so that it was the size I wanted.  Next I had to frig with the levels, the hue/sat, and the contrast to get the color tones correct.  Next came a tutorial I had to watch to figure out how to export the file properly.  Once I had exported it and went into Picasa to put my watermark on I ran into another problem.  The file was a .jpg but it kept saying that it was locked or not available when I would try to save my edits in Picasa.  Turns out that there is something wrong with how GIMP's new version saves the metadata.  After searching through Google file after Google file I finally found out how to fix it.  I had to go back and re-export it from GIMP and uncheck the "Optimize" and other boxes that were pre-checked so it just exported the file with no added data.  What a pain!!!!  But I'm a cheap Scotswoman so I was just dealing with it for the free program.  Oh and when I downloaded GIMP in the first place it put some adware on my hard drive that my virus scanner had to kill.  Nice.

This next photo was edited using PSE11 last night.  It took me about 30 min to figure out and apply the edits that I wanted to get this final result:


I used these two photos to make it:

f/22, 1/30 sec, ISO 800 using 300 mm lens at 300 mm

f/4, 2 sec, ISO 1600 using 70-300 mm lens set at 70 mm

What I did was use the smart lasso tool in PSE and capture the moon.  Now, the moon is not quite full so I had some trouble with that lower left corner where its darkest.  I had to go into the "Refine Edge" option and shrink my selection area to exclude the darkest bits.  After that I just adjusted brightness to make it so it was almost bright as the original but you could still see the crater shadows just enough so that it was realistic.


Then I got a challenge to add a moon to this photo:


Its a photo of my parents' house in Westford, VT.  I did a long exposure of 6 seconds at f/8 and 1600 ISO. I removed the noise caused by the long exposure and the high ISO in Lightroom 3.  The moon was behind me as this photo was taken at 6:22 pm facing West.  I used the same moon photo as above (the one with the black sky) and cut the moon out in the same way.  Next I shrank it manually using the little boxes that around surrounding the selection of the moon.  I moved it where I wanted and then did the same "Refine Edge" option but since my sky is darker here in this photo I didn't have to shrink my selection as much.  I then used one of the layer filters Hard Light blend mode on just the moon and it gave it the right contrast and coloration that I was looking for.  The final result is this:


I wasn't completely happy with how it looked right out of the PSE gate so what you also see here in the above photo is my use of Picasa's HDR-ish filter with radius and strength slider almost all the way to the left and slightly faded into the original, and also a slight Orton-ish filter used to "bloom" the highlights and deepen the colors.  The end result being slightly surreal but pleasant.

I am looking forward to learning more about this program and hopefully creating some more moonscapes!

Friday, November 23, 2012

Star Trails Experiment

Ever since I was a little girl I have been fascinated with astronomy.  When I was 6 years old my favorite book was Our Universe, which was a huge NASA publication filled with fascinating facts and artist's renderings of what we knew at the time.

In 2nd grade (I was 8 years old) I did a huge science project on the Challenger, including writing to NASA, receiving a bundle of photos and literature from them (pre-explosion), and I even got to pick photos that were then used on the memorial.  I listened intently to the lift off and cried when it blew up.  Christa McAuliff was my hero.

Something I have always wanted to try was astrophotography.  Unfortunately I don't have a lot of the equipment needed, or the time to get away in the middle of the night, or a dark back yard so I don't have to get away.  My camera's ISO only goes up to 1600 which kind of puts a damper on a lot of things.  BUT I do have the drive to at least try.

I set up my tripod in my not dark at all back yard the other night.  I was determined to get SOMETHING in the way of star trails, and to learn a new software technique called "stacking" that I have seen others get really cool results with.  I downloaded StarStax (free) and for one hour I took as many 6 minute shots as I could.

I followed the setting recommendations:
  • ISO 1600 (highest mine will go)
  • f/4.5
  • Widest angle I can get with my lens, 18mm
  • I also turned off Image Stabilizer, Auto Focus, High ISO Noise reduction, and the other noise reduction that is an option in my custom menu.  
  • Shoot in RAW format as the software only wants TIF files and won't work with JPGs. 
  • TRIPOD a must. 
  • Used BULB mode and my wireless remote.
One small note here that I discovered:  turning off those noise reduction features really made a huge difference in how long it took to process the photo in-camera.  What I mean by that is I have finally figured out why I had such bad camera lag when shooting long exposures with a higher ISO than 200.  For the longest time this has baffled me.  Its just about instant now even when shooting a 6 or 8 minute pic!  Glad that mystery was solved.

Here is my first attempt:
enlarge for detail

Meh.  That is a 12 photo stack.  The brightest streak to the right is the planet Jupiter.  The reddish one under it is Betelgeuse.  I had thought I aimed at Polaris, the north star, but clearly not the case.  I also didn't like how I barely had any stars at all.

My second attempt, using a method in where I take 120 shots at 30 seconds each.  My camera will only let me program it to take 10 shots in a row.  Bummer.  So I had to keep getting up every 5 min, running outside (it was frecking cold out), and having a 10 second lag in between because to use that drive mode it simply HAD to have a 10 sec timer in between each 10 shots!  BLECH!  So annoying.


enlarge for detail

The first one here is with me warming the tone and adding a slightly reddish tinge, just for fun.  The bottom one is the original with my camera's white balance set to Tungsten.  You can see I did squeak the North Star in the top left corner, but just barely.  This shot took me over an hour to do so I really didn't have time to make another one.  The trees are light on top because one of my neighbors insists on leaving every light in their house on and their back porch light 24 freaking hours a day, 7 days a week.  

I will be out again next time its clear and cold.  There are aurora about as well, which I am dying to shoot, but I would have to drive 20 min to a very dark place to see them at about 2 in the morning, and with 3 kids and a lot of responsibility that requires me to not be a walking zombie I am having a hard time getting out there.  I just need to be patient.  

For some awesome inspiring aurora/star trail time shots visit my friend Brian Drourr's smugmug page.  I hope to shoot with him someday.


Monday, October 15, 2012

How To Watermark Using Adobe Lightroom

I wrote a post a while back about how to watermark your digital images using Picasa, but now that I'm using Lightroom almost exclusively I thought I would write one about how to watermark in there.

First, edit your photo to how you want the final image to look.  If you are like me, you resize your images and watermark them for internet use, and then export a full size one to your hard drive for personal/selling purposes.  When you are ready to export the image you want watermarked, go to the Library module:


Next click on the Export button in the bottom left of the screen.  You will get this window:


You will need to scroll down a bit to see this menu item "Watermarking".  Check off the box next to Watermark:  and the drop down menu will become available to you.  Choose "Edit Watermarks" and this window will come up:


Enter what you want your watermark to say in the text field indicated above.  OR you can upload a previously made graphic watermark by choosing a file under "Image Options" located at the top right.

Choose the alignment of your text watermark under Text Options.  This does not move the watermark around on the screen.  It is just like when you type a paragraph in Word and choose the alignment of the text.  My text is aligned Left, meaning that each line of text will start under the left-most character of the first line.

To move it around on your photo scroll down to this part:


Here is where you choose the Opacity, or translucence, of your text.  If you want it very bold and obvious you would slide it all the way to the right.  If you want it fainter and more "see-through" then you slide to the left.

You can also choose the size of the watermark itself, and you can rotate it if you want it sideways or upside down using those buttons on the bottom right.

Anchor is how you choose what part of the screen you want it to be added to.  I chose the bottom right and clicked the corresponding button.  You can see in the thumbnail image above exactly where and how it is going to look, which is a really nice feature of both LR 3 and LR 4.

*You can also hover over the preview image and move it around that way, but I preferred to use the anchor buttons when playing around with it.

Click on Save and it will give you the option to name your watermark and use it for the future without going through all this again!

Finished product will look like this when you export:


Tuesday, October 2, 2012

Wake Up Call

It had rained here in Milton for the past 3 days straight, all of which I was extremely ill with a bad sinus cold so that was OK I guess.  Unfortunately we are on the verge of a foliage season so I was frustrated beyond belief for several reasons!

Last night at probably 3:00am I heard a tiny whimper next to my ear.  It was my almost 3 year old daughter. She is finally the age where she gets out of bed and comes into my room when she has a bad dream. I pulled her up into bed and she curled up on me and went to sleep.

When my husband woke me up at 6:40am (cruel & unusual punishment, middle school is!) she was still laying on me, fast asleep.  I didn't want to disturb her and was so tired I fell back to sleep.  This is bad.  I need to get up to bring my son to school by 7:25!  Suddenly I got a text message, and at some point some child had set my ringer to super duper extra banshee and it jolted me back awake.  That darn husband of mine knows me too well.  There is one sure fire way to get me out of bed in the morning. The text said "The clouds look really beautiful right now!"

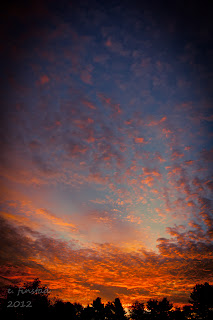
I slid my arm out from under my daughter and grabbed my camera and went downstairs.  Indeed, the clouds were absolutely gorgeous.  My eyes were so dry I could barely see, but I could tell it was a good sunrise.  I fumbled with my camera settings as I had done an indoor shot last night.  ISO was set too high.  I hit every button on that camera until I finally figured out which one was ISO.  Now, I have had that camera for three years.  I can usually use it in my sleep!  Sunrises are fleeting so I was panicking. Finally I got it figured out, and here are the results:


Click on first pic to view in a gallery style window!


Saturday, September 29, 2012

Fall Foliage 2012: To Be or Not To Be

I am not sure if I am just way to eager for the foliage season to appear because I want to take pictures of it or if there really is going to be some kind of problem with it this year due to the super hot dry summer we had.  It seems like its taking forever to get here to the Champlain Valley (I hear its pretty good in the NEK) and what I have seen so far is kind of...ugly!  Lots of brown, dead, crispy leaves instead of the rich reds, oranges, and yellows we usually get here in Vermont.

BUT I have been going through my external 1 terabyte hard drive trying to make space on it so I don't have to buy another one quite yet, and looking at Fall photos from 2010 and 2011 shows me that really the first 2 weeks of October are the best here.  So I need to just hold my horses.

I did go on a few easy hikes (and 1 harder one) over the past couple of weeks, and here are the best results of what I've seen so far:

Prospect Rock (Long Trail in Johnson) September 15, 2012:


Underhill State Park Sept. 19, 2012:


Niquette Bay State Park (Allen Trail) September 25, 2012:


Tower Road in Graniteville, VT September 26, 2012:


As you can see, Graniteville, which is in mid-state VT but a higher elevation, has the best so far!  If the weather cooperates I hope to get out as much as possible (also when this head cold goes away) to see how it is progressing elsewhere!  

On my list of places to go: 
Stowe
Underhill
Cambridge
Ripton
Middlebury
Burlington
Lake Elmore
Lake Carmi
Newport/Derby

Its possible I will only be able to go to one or two of these places but I'm hoping for a few...its hard because I only have about 5 hours of "free" time between when I drop the last kid off at school and then have to pick up the first kid.  

Thursday, September 6, 2012

Click to View Monarch Gallery


Over 60 different photos of Monarch butterflies in varying states of their life cycle.  Available for download, prints, and much more!

Friday, August 24, 2012

Monarch Mania


When I was a little girl it was a huge treat to find a Monarch (or any other kind) caterpillar.  Even though I lived in a very rural area growing up I never really knew what their eggs looked like or how to find them.  Back then we didn't have Google Image search!  The past few years I have been looking for the caterpillars, but despite the abundance of milkweed in my town I have only found one or two in the 8 years I've lived here.

That has all changed.

When I am determined to do something I am the kind of person that will do everything in my earthly power to make it happen.  I decided to become determined to find eggs and larvae, and lots of them.  My 8 year old daughter has been deathly afraid of insects for as long as I can remember, even butterflies.  This does not make sense to me because I spent my childhood in search of the weirdest looking bugs I could find.  A Helgramite takes that cake, by the way.  I turned over rocks, peeled bark, played in fields of tall grass for hours, and could often be found in a swampy ditch with tadpoles in hand.

In order to help my daughter conquer this fear I figured that if she could go out and help me find eggs and then watch the whole amazing process of metamorphosis in her own home that perhaps she would find a new appreciation for the incredible world outside.

We had already hatched one butterfly from a caterpillar I had found in my garden.  I tried to stay up to see it come out of the chrysalis but it happened very early in the morning last weekend.  I got some photos of the chrysalis and then of the adult before I let him go.


Unfortunately the kids didn't get to see him before he flew away so I felt that we should try again.  In one day we found 10 eggs.

The first 5 we found in the cemetery near my house.  Then we went on to my parents' house in Westford and found 5 more plus an almost full grown caterpillar (4th instar) and a probably 2 day old caterpillar on the same plant!  I put the ends of the leaves in a shallow tupperware with enough water in it to keep the stems wet.  I put the caterpillars each in their own small tupperwares.  Then I put everything in the Butterfly Pavilion that my friend gave me.

Today I took an early morning walk with my daughter and just because we were walking past some milkweeds we decided to look for the heck of it.  We brought home 3 more eggs.

Then I went across the street into the field next to the construction site and the Dollar General to get some fresh leaves to feed all these prospective creatures.  I read somewhere that they like the freshest youngest leaves possible.  In the center of the path that is mowed through that field were a bunch of young plants that were popping up.  I picked them as close to the ground as possible so that I could keep them in glasses of water and have fresh leaves.  Upon closer inspection I noticed that there were eggs on several of the leaves!

So now we are up to I think 16 eggs, 1 mature caterpillar and 1 baby caterpillar.  One of the eggs is just about ready to hatch also!  I'm going to be a busy leaf gatherer soon if all of them hatch!


Wednesday, August 1, 2012

Lightning Fever!

Over the last couple of weeks some strong storms have moved through and past my area.  Because I have been participating in a Facebook group that has brought over 150 Vermont photographers together I have found myself a little more daring and resolved to better my photography and try new things.  Namely, trying to get a good shot of lightning on purpose.

Here is a pic that I took back in 2010 after a storm that I got caught a mile away from home walking in:

That was the only one I had taken that came out good in the past 3 years.  It was handheld and totally accidental. 

Now I have learned the importance of a tripod for such things.  I usually hate using a tripod because it really restricts me and limits me to that one spot.  However, I used one a week ago and got this photo:

This storm was particularly violent so the odds of me getting a shot of lightning were in my favor.  I waited until the storm was flashing in my back yard and then opened my back screen door, set up my tripod, and started pressing the shutter button.  I pushed that button 350+ times to get this one!  Again though, it was more of a lucky shot than anything else.  

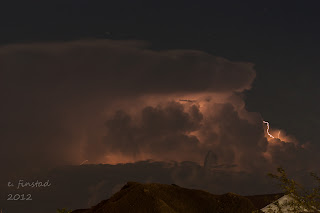
This past Saturday I happened to look out the window and saw this:

I got all excited because I hadn't seen any of these this year yet, and because I knew I would get another chance to try to get a lightning shot, this time at night so I could do it the "right" way.  When it got dark enough, around 9:30pm, I got my camera, tripod, and wireless remote and ran across the road to the Dollar General parking lot.  I wore sweatpants and a hooded sweatshirt and socks because it was so buggy I knew that I would get eaten alive.  The cloud was fairly active so I played around to see what settings would work.  

Using BULB mode, I decided that an aperture of about 8.1 was sufficient, and an ISO of 200.  I held the shutter open up to 40 seconds, depending if I caught a flash of lightning or not.  I also strongly recommend using RAW format if you can.  It takes much less time to recover from long shutter speeds.

Here are the best results:


This one was 40 seconds exposed.  

I wish I could have stayed out there longer but it was just too buggy and my husband was waiting for me so we could watch Cheers, which he had never seen before until last week :)
Looking forward to the next storm so I can try again!


Betsy Finstad